The tablets are all registered under our generic 5th grade gmail, so when I created the documents under my personal gmail account, I only had to share with one email account. This saved a lot of time, but I have also had to trust that my students will stay in their own folders, as they can access everyone else's work (and they have kept to their own, for the most part, besides the occasional fun of sneaking in to their friend's document to send them a message).
Anyways, I would like to share the "how-to" and logistics, organization, and pros and cons behind our experience and hopefully I will be able to provide some sense of guidance to someone out there who is looking for a way to integrate technology and the collaboration piece. I understand that there are a limited number of classrooms out there that are 1:1, but classes can also be taken to a computer lab to do the same collaboration work, because as usual, the web-based drive is a lot more "friendly" than the app.
If your students do not have their own gmail accounts through your district, I suggest you create a generic class/grade level email that they can use to log on to Google Drive on devices or on computers in a lab.
1) First I created two folders on my personal Google Drive, one for each of my classes.

2) Within each folder, I created a folder for each of the small groups that we had created in each class. The groups were interest-based groups that I formed based on a survey that the students were given. The groups would be working together to create an informative magazine in Google Drive on their topic. The small group folders were titled with the group's topic of their magazine and the name of their group "leader."

3) Within each group's folder I created templates and checklists that they would need throughout the project. I did the actual "creating" and naming of documents and then made multiple copies of each document and moved them to each of the folders. This was probably the step that took the most time, as I had 16 small groups between my two classes.

4) I then shared my class folders with our generic 5th grade gmail account. You can share a few different ways. I right-clicked on each folder in my drive, went down to share and then entered the email address. Don't forget to change the settings (in the same place where you are sharing) so that anyone who has the link can edit the document. Once you share a folder, it automatically shares everything in the folder and anything you add to the folder too!

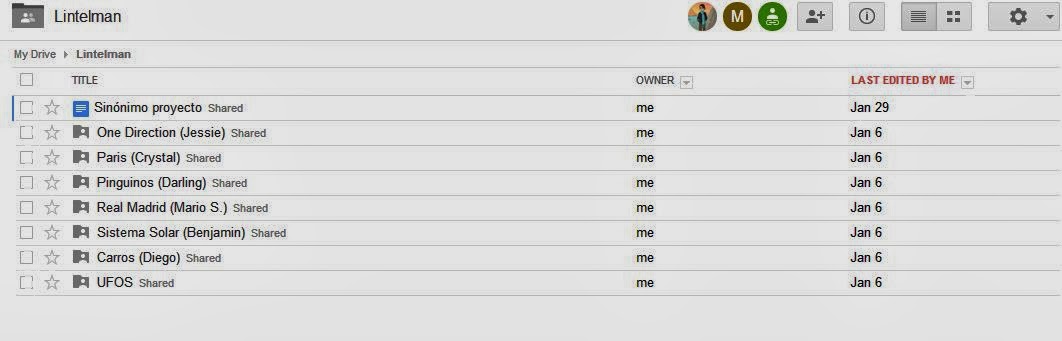
5) Students can log in, open their Google Drive app, and view documents "shared with me." Then they can choose the class folder, then their group folder, and whichever document they are working on for that day. The web-based version of drive was pretty simple to navigate when we went to the lab to add finishing touches to our projects that were not possible through the app.


There were not many bumps in the road throughout the duration of this project and I definitely feel that the pros outweigh the cons...
PROS
-All student work is in the same place, easy for students and teacher to access
-All students can work collaboratively in groups, as well as independently at the same time
-Students were in charge of working together to divide up and delegate workload
-Collaboration leads to discussion about topic which leads to deeper learning
-Students collaborate and make joint decisions about formatting, text and images, document design, etc.
-Mirrors real world, job-like collaborative situations
-Students and teacher can offer immediate feedback to others
-Easy for students to monitor their progress towards their final project
-Easy for teacher to check daily progress
-Teacher can monitor individual contributions to the group
-Easier grading- can grade from tablet, desktop, or home laptop- (Don't have to carry anything to and from school!)
-Can house more student work for a longer period of time for easy access in the future
-Can easily share with others and display through school website, Edmodo, blog, etc.
CONS
-Syncing issues- on some days our tablets had trouble connecting to the network to sync and receive the documents I had shared with them
-Students had access to all students' work
-Extra time for students to learn to manage a new platform, which actually wasn't much
-The app was not as easy, "friendly" to manipulate
-We had to take a few days to finish our project in the computer lab- font type, sizes, colors, adding and moving pictures, and inserting page numbers
Please see my next blog post for examples of student work for the collaborative informative magazine project!
No comments:
Post a Comment